Does the pointer read Zero?
If the pointer reads zero (0), repeat the process 3 times ensuring you obtain the same result on each swing . Once complete, you are ready to proceed to the next step.
The pointer does not read zero
- If the pointer goes above zero, then the friction rings need to be tightened by rotating them very slightly in a clockwise direction.
- If the pointer is below zero, then the friction rings need to be loosened to reduce the friction on the spindle. Move the friction rings very slightly in an anti-clockwise direction.
Once the friction rings have been adjusted, release the pendulum arm so that it swings freely without coming into contact with the surface. Catch the pendulum arm on its return swing and place it back into the release mechanism.
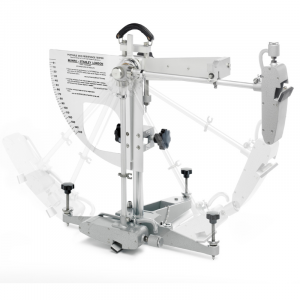
Does the pointer read now zero?
If the pointer now reads zero (0), repeat the process 3 times ensuring you obtain the same result on each swing. If not, repeat the process above until you achieve 3 consecutive zero swings.